

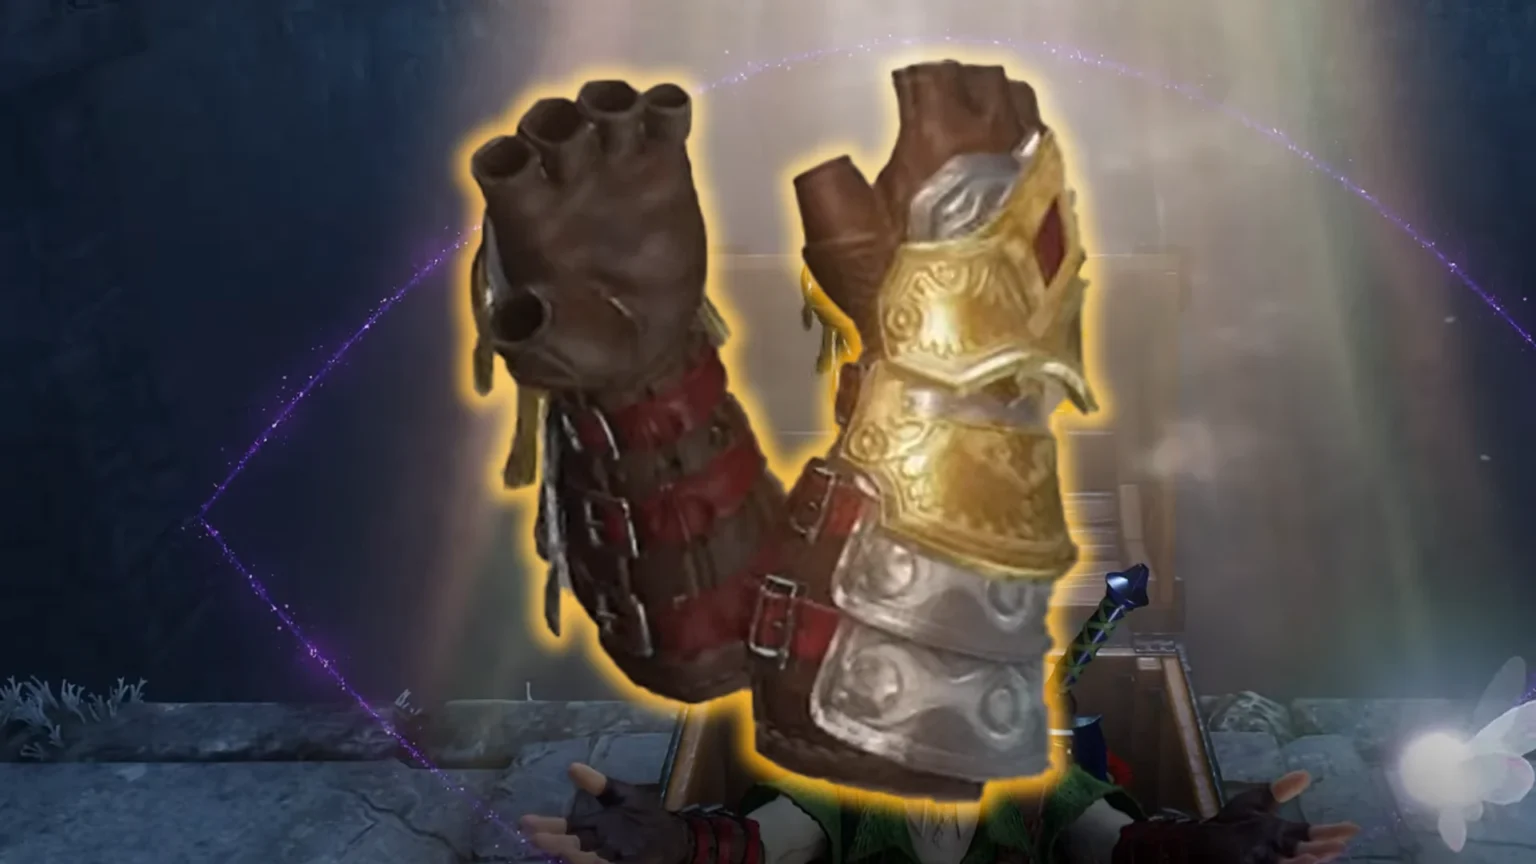

As you explore the world of Zelda: Ocarina of Time Remake, you’ll encounter hurdles that block your path to certain areas. There are many of them, which tell the player to grab a specific item to gain access to the locked area. Golden Gauntlets are one of the interesting items in the game that allow Link to carry heavy golden stones found in the game. While they share the appearance of the regular gauntlets with a bit of golden flair, the true purpose of the gauntlets comes to life when you interact with heavy stones and watch Link lift these stones up like a sheet of paper.
In this guide, I will show you the way to find the Golden Gauntlets and solve all the puzzle rooms that come before the item. Be prepared to solve quite a good number of puzzles before laying your eyes on the golden pair of gauntlets in the game.
Golden Gauntlets Location in Zelda: Ocarina of Time Remake
You will find the Golden Gauntlets in Ganondorf’s Castle in the Shadow Temple (Purple door)section of the game as an Adult Link. It’s going to take a while to get to the Shadow Temple door, so here is the route that you must take to get to the temple with the Golden Gauntlets:
- Going through the Forest Temple
- Going through the Water Temple
- Heading inside Shadow Temple
Going through the Forest Temple
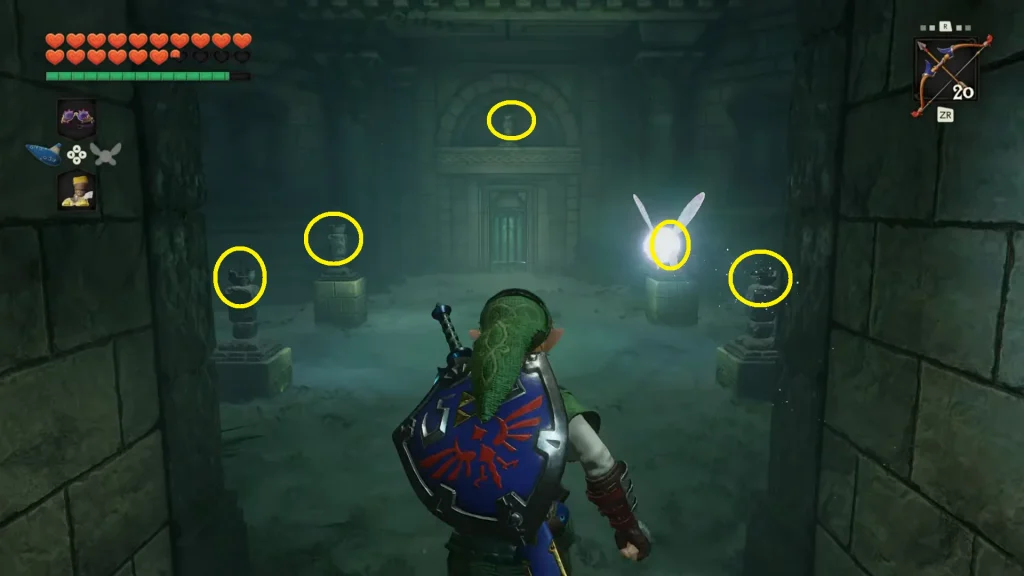
Once inside the Forest Temple, defeat the wolf, then light all the braziers in the area. There are five of them; four are on the ground, and one is on the door. Lighting all five of them opens the door to the next room.
Note: You can use Din’s Fire or a simple Fire Arrow to light all the braziers in the area. Din’s Fire sets up an AOE explosion, setting fire to all the braziers on the ground at the same time; Fire Arrow is perfect for the last one above the door.
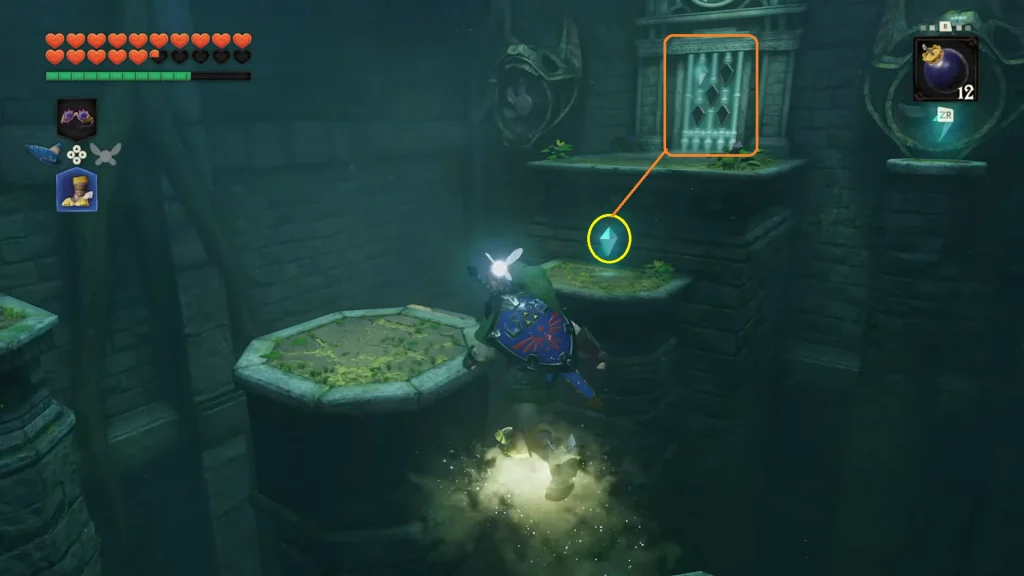
In the next room, we have a wind environmental puzzle room. The door is straight ahead, but it requires five diamond-shaped items to unlock. If you look around, you will see the blue glowing diamonds floating in the air. It’s time to equip the Hover Boots and start gliding in the air to grab all five diamond-shaped items in the area. I recommend getting the diamonds on the lower platforms first, then using the pressure plate button on the northeast side of the room to access all the diamonds on the upper platforms.
After clearing this one, in the next room, shoot the orb releasing dark energy with a light arrow to free the door. Now, move to the Water Temple to continue along the route.
Going through the Water Temple
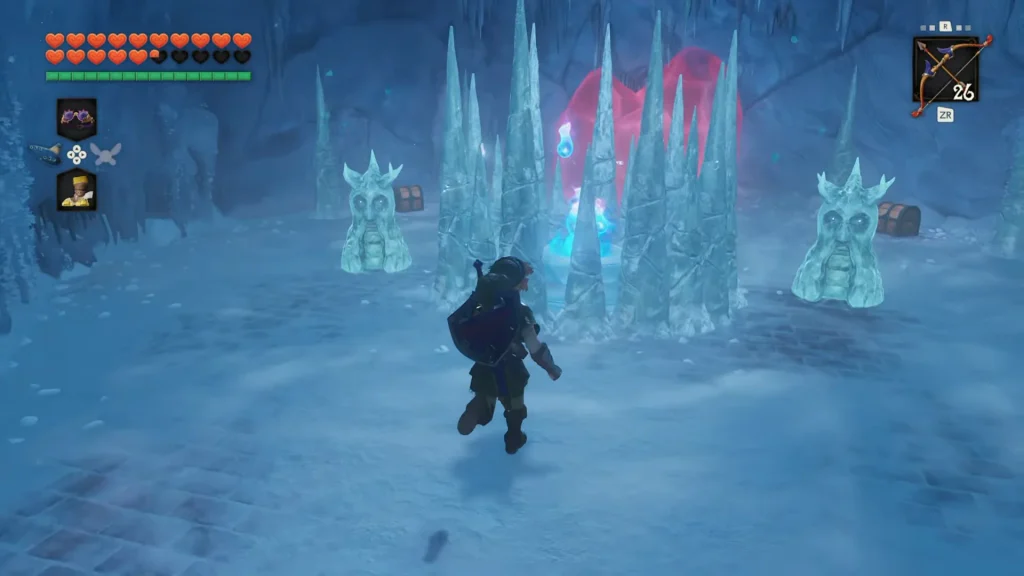
Once you enter the Water Temple, you will come across a red icy stone blocking your path; luckily, you will find a stream of blue fire in the middle of the room covered with icicles. First things first, take care of all the enemies in the area, then equip an empty bottle and scoop the blue fire found in the center of the room. Now use the blue fire bottle on the red icy stones to melt them into pure liquid, opening the door. Before leaving to the next section, head back to the stream of blue fire and get another bottle of it.
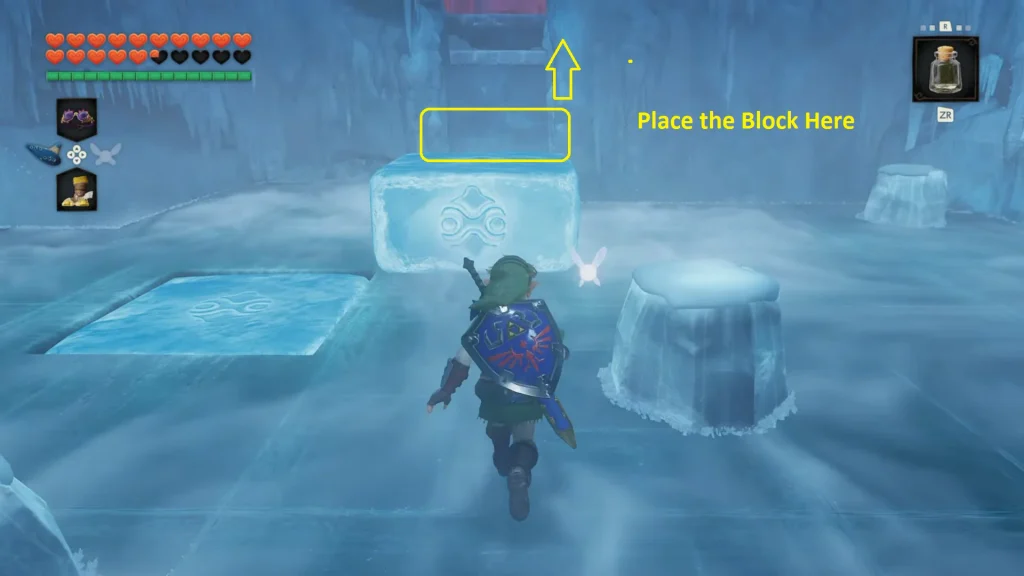
The next room also has a puzzle waiting for us. If you look to your left, you will find another block of red icy stone a bit high above on the side of the wall. This means you must use the icy block on the floor to create a climbable platform to the icy stone.
First, push the first block of ice into the shaped hole on the ground. Once the hole is filled with the ice block, you can use the next block of ice to slide into the area to create a platform in the location shown in the image above. This will create a climbable path to the red icy stone on the side of the room. Here, use the blue flame bottle to melt the icy red stone. This will reveal a pressure switch on the ground. Equip the hammer to smash the switch to lift up the steel barricade from the door.
Go through the door, then you will have another door blocked by the orb releasing dark energy; same as before, equip the light arrow at the orb to open it.
Inside the Shadow Temple
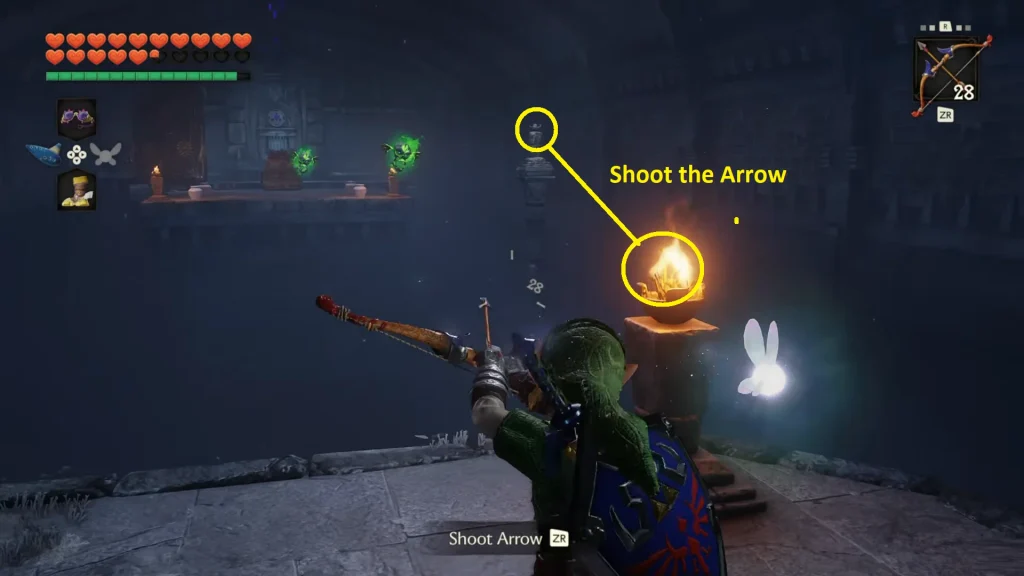
Now head to the shadow room to reach the final phase to get the gauntlet. At first glance, the entire room will feel empty, devoid of any platforms. First, equip the arrow and shoot through the torch on the side to the empty brazier hovering in the air on the right side of the area.
Once the brazier is lit, it will make the platform appear on the surface. Now get on the platform and move forward until you are on the floor with a large enemy. This specific enemy is susceptible to a charge attack, so release one to take it down quickly. Now, if you look to your right, you will find a button at a distance. Use the hover boots to walk over to the button or pressure plate; this will spawn the treasure chest behind it. Open the chest to get the Golden Gauntlets.
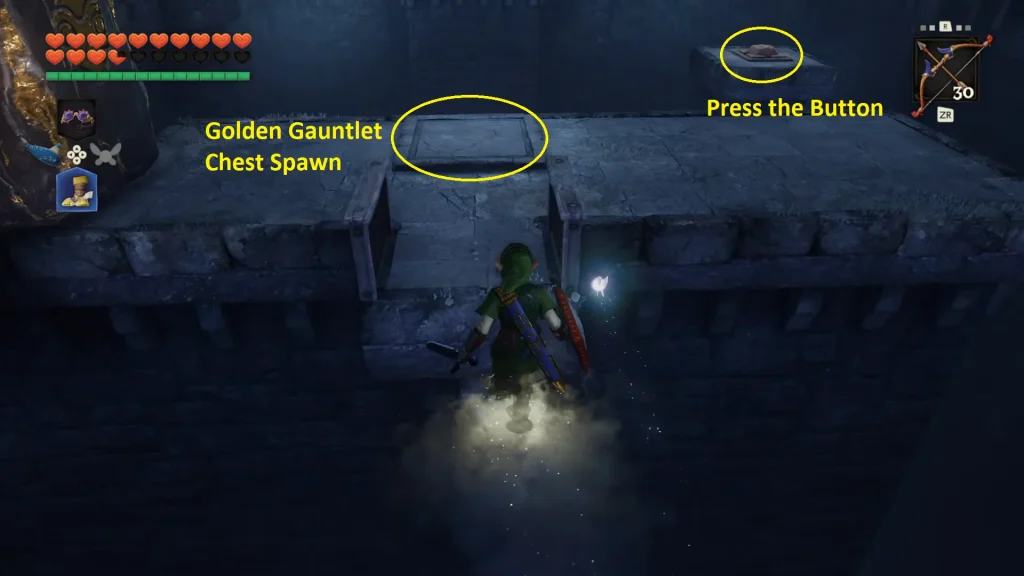
If you look to your left from the treasure chest, you will find a giant golden stone blocking your path. Previously, interacting with it let Link move the whole thing, but now, with the Golden Gauntlets, you can lift the rock and explore the area.
