





Finding special weapons or just simply getting your hands on all of them makes the game a breeze to go through. While the starting weapon set in End of Abyss does deal a decent amount of damage, the game has 5 other firearms or weapons that can deal better damage. Some of them are obtainable through the storyline, others are well hidden in areas that you wouldn’t dare to look or even find. Suffice to say, it’s easy for you to miss out on these weapons if you just stick to a certain path, and the last thing you want to do is miss out on a weapon in a game about killing enemies.
End of Abyss follows the classic Resident Evil formula of player exploration to reward the player with new items and weapons. In this guide, I will help you find all six weapons in End of Abyss.
All Weapons in End of Abyss
| Weapon Name | Requirements |
| Pulse Gun | None, Starting Weapon |
| Riot Breaker | None, found through common exploration |
| Security Rifle | Explosive Charge and Factory Keycard |
| Incinerator | None |
| Support Gun | Explosive Charges, Grappling Hook |
| Particle Disruptor | Infirmary Access Keycard and later Restricted Access Keycard |
Pulse Gun
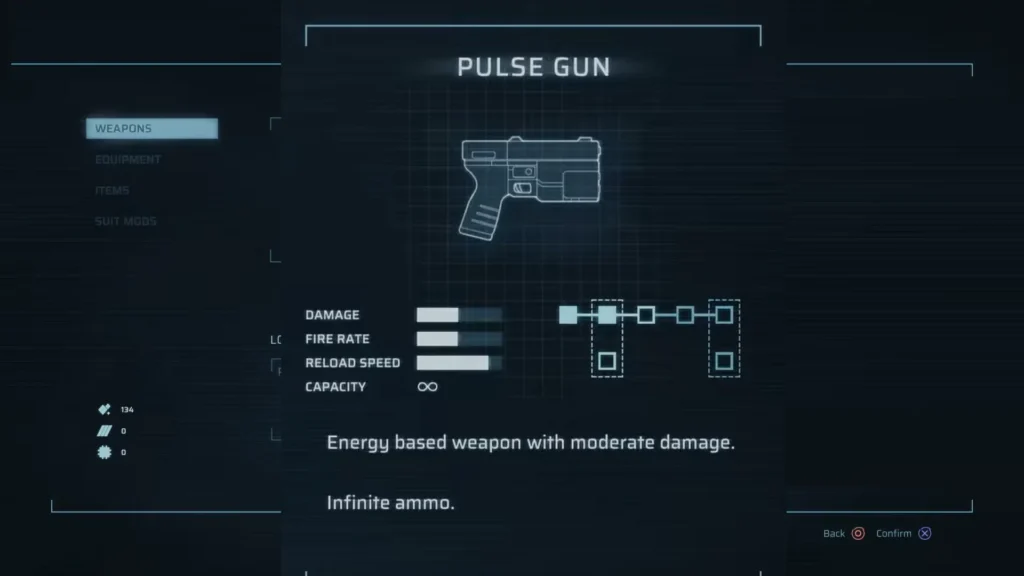
The gun is accessible right from the beginning of the game. Pulse Gun is your basic starting pistol that comes with infinite ammo “technically”. After emptying a clip, you must wait for the gun to recharge; only then does it get to an operable condition. The game heavily punishes rapid-fire behavior; if you empty a clip without thinking, then you must face the consequences afterwards. The pistol fires energy projectiles and deals a decent amount of damage; you have the option to hold the fire button to release a powerful shot.
Note: Do note that if you do fire up a charged-up shot, the pistol will be unusable for a brief period.
Riot Breaker
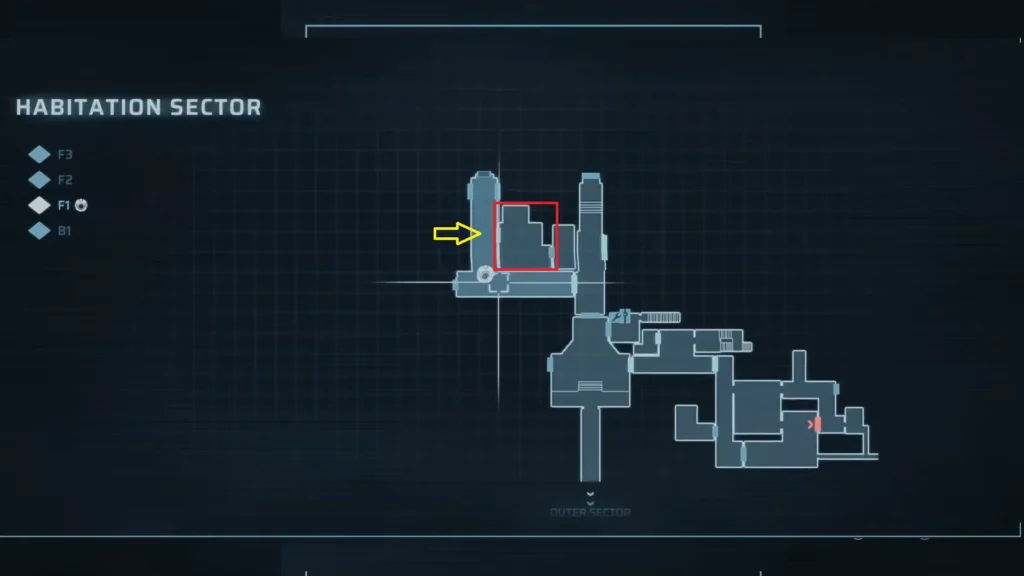
When the main objective leads to unlocking the shuttle entrance at the Habitation Sector after activating the beacon in the Communication Center. Head to the red cubicle spot marked in the F1 in the Habitation Sector. Here, vault over the wide window on the right, and you will find the gun lying on the ground near the doorway.
The Riot Breaker uses Heavy Impact rounds to deal damage, but it is only effective at close range; the fire rate is also slow. It’s your typical shotgun experience, perfect for situations when you find yourself backed up on a corner. Not a gun to miss out on; in future combat scenarios dealing with multiple enemies at the same time, this gun will save your skin many times.
Security Rifle
Requirements: Explosive Charge and Factory Keycard, both are obtained through story progression.
Continue progressing in the game until you unlock Explosive Charges in Factory West on your way to override the area’s SCU. Another item you will need is a Factory Keycard, which is a story-related item that you will get when pursuing the reactor. The Explosive Charges allow you to destroy any weak walls; with the charge at hand, head to Floor 2 of Factory East.
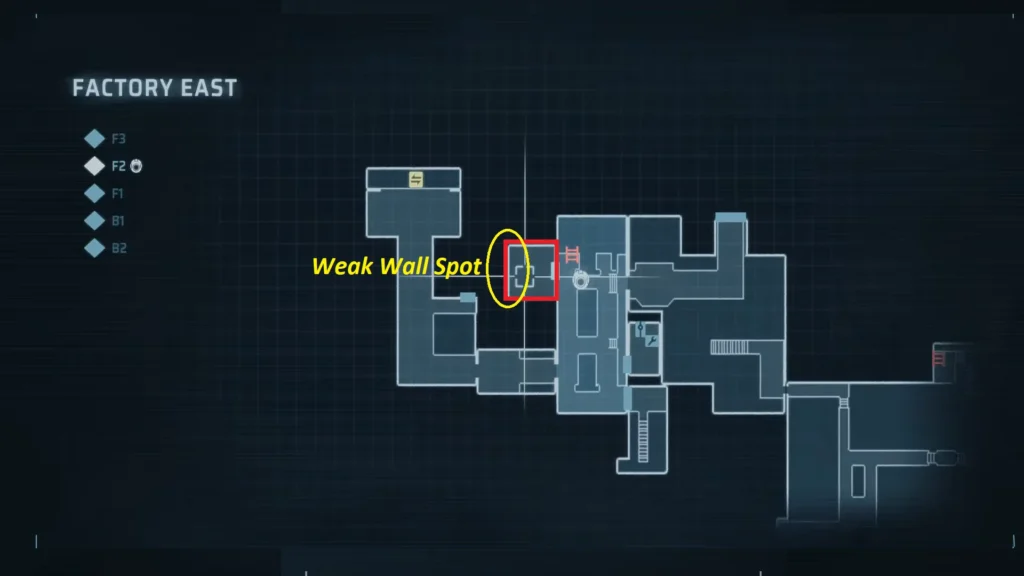
Now head to the rectangular room marked with a red cube in the image above; the wall on the left side of the room is breakable, as highlighted with a yellow circle. Set the Explosive Charge on the wall, then move some distance away from the bomb, and then shoot the charge to break the wall and create a hole through it. Now head inside, and you will find the Security Rifle.
The one notable aspect of the Security Rifle, it uses armor-piercing bullets. Basically, the Security Rifle is your sniper rifle in the game that uses heavy rounds, effective against many enemies. It comes with solid damage and reload speed but a slow fire rate, as is expected from a sniper rifle.
Incinerator
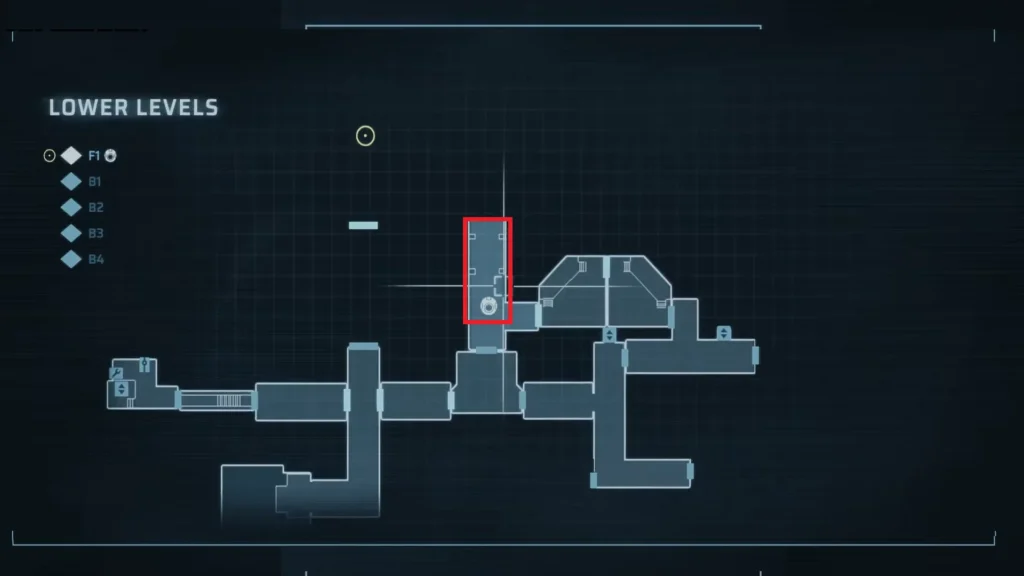
You will find the weapon on Floor 1 of the Lower Level; it’s part of the core storyline. After overriding the three SCUs, you will move on to the Lower Levels. Here, you will come across the weapon, Incinerator, during the objective Neural Chamber. When you cross the corridor to the Save Room on Floor 1 of the Lower Level, you will find the weapon lying on the floor of the corridor, as marked with a red cube in the image above.
Compared to all the other weapons, this one is harder to miss as it is tied to the core main story progression. The Incinerator is just a flamethrower that deals very low damage, but it has an amazing fire rate and reload speed; the capacity is capped at 100, so you can fire it away, burning most enemies standing before you. Don’t expect to deal too much damage; the goal is to stop enemies on track by setting them on fire. The damage is more tuned to damage over time than instant damage, like a shotgun.
Support Gun
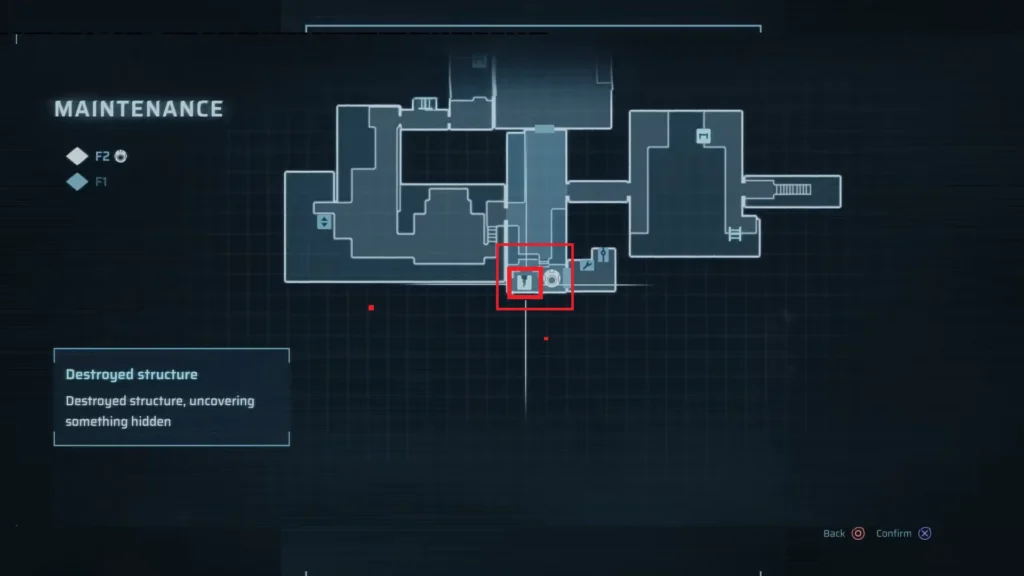
Requirement: Explosive Charge and Grappling Hook. While I discussed the way to get your hands on Explosive Charge, Grappling Hook can be found in the Containment Sector when you are overriding the SCU.
This is going to be a journey; get to the point shown on the map with the red cube on Floor 2 of Maintenance (Located in the southeast corner of Factory West, F1). Here you will find a weak floor that you can set up the Explosive Charge to break open and reveal the hidden route underneath. Set up the explosion, break the floor, and then jump down the hole.
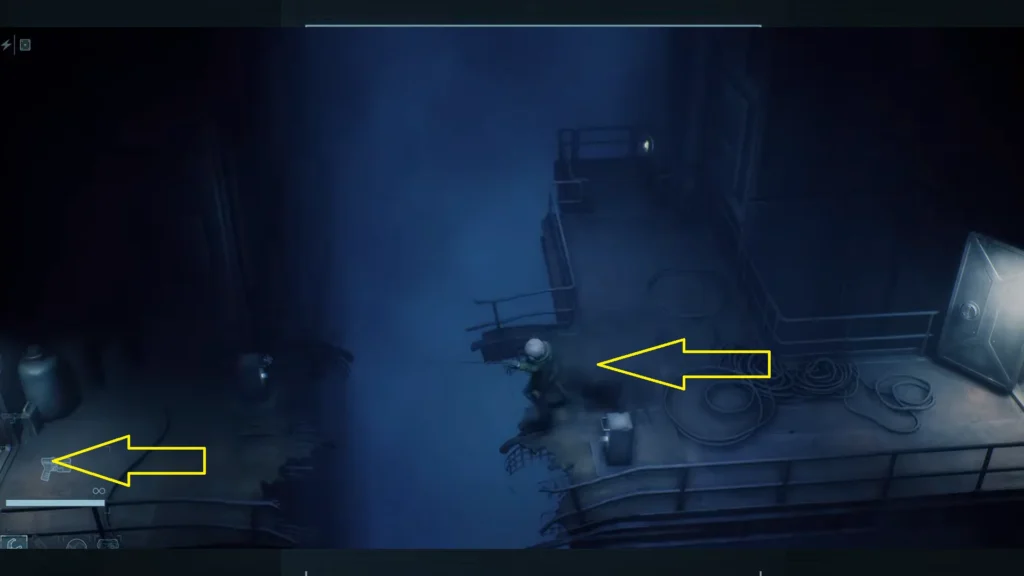
Now take the path on the left and keep moving to the left until you find a broken bridge; here, use the Grappling Hook to jump across the gap. Then again, follow the path on the left.
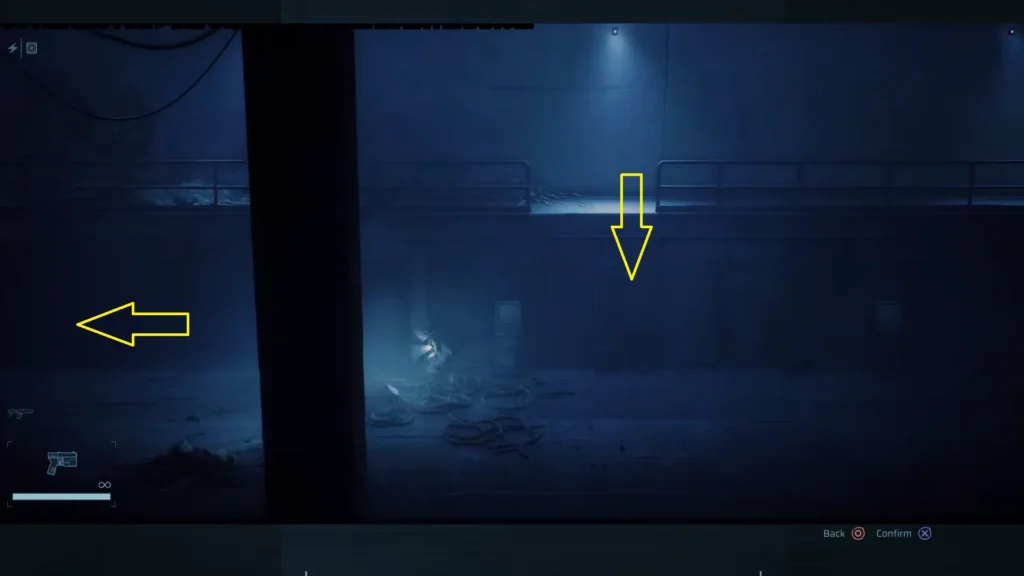
After a long walking session, you will find yourself in a long walkway with a gap between the railings, as shown in the image. The game will give you the option to Jump Down, and that’s what we will do: drop down and keep moving to the left. Soon after following the path on the left, you will reach the Outer Sector.
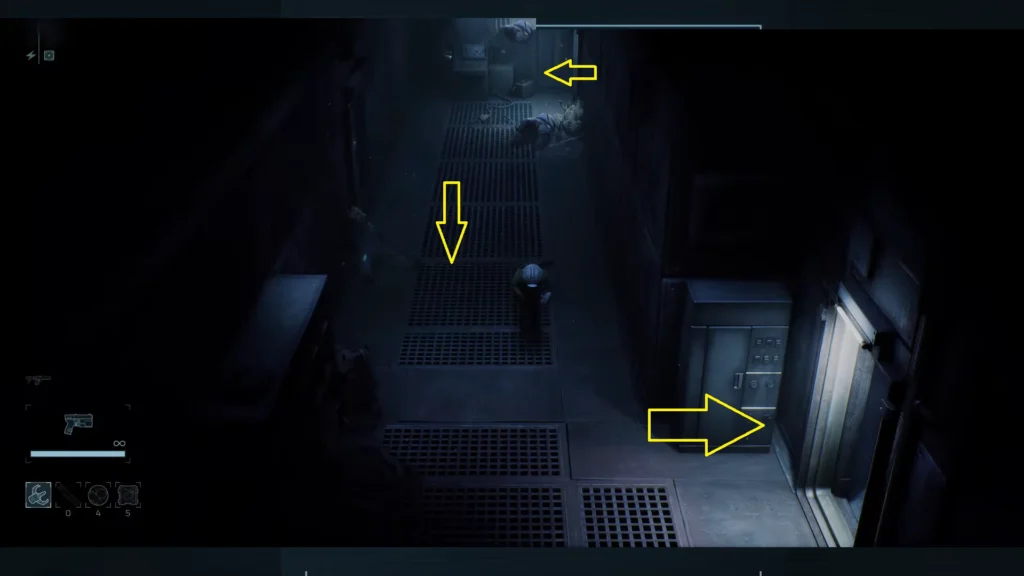
Keep moving left, pass or skip the first ladder, and climb the second ladder on the route. Now again, move to the left until you are in a narrow room, with a route taking left and another one leading to the right. Take the route on the right, as shown in the image.
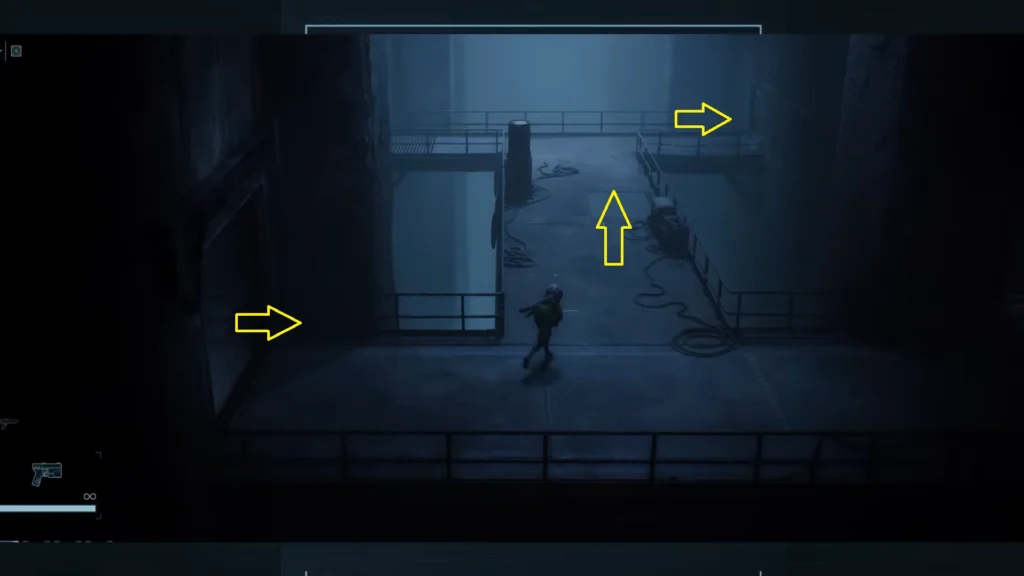
Follow the path, head up the stairs, and then turn right. Now in the new area, we are faced with multiple different paths, but only one will take us to the gun, which is the path on the top-right in this room, marked with the yellow arrow.
Once inside, get down the ladder and climb down the stairs; here you find a weakened floor underneath the pile of wooden boxes. You can’t miss it, as there is a light pointing at the weak spot by illuminating the space around it. First things first, break all the wooden boxes, and then set the Explosion Charge to blow the wall and reveal a hidden area.
Note: Once you drop down, you will get ambushed by many enemies, so be prepared before dropping down the hole. Once ready, drop down, kill all the enemies, and then you will find the Support Gun on the left side of the room.
Support Gun offers low damage but a good amount of fire rate and reload speed, a perfect assault gun or SMG in the game. The fire rate is what makes it perfect, so you can hit multiple enemies without worrying about the ammo running out. The damage also piles up since you are firing multiple rounds.
Particle Disruptor
Requirement: Infirmary Access Keycard and later Restricted Access Keycard
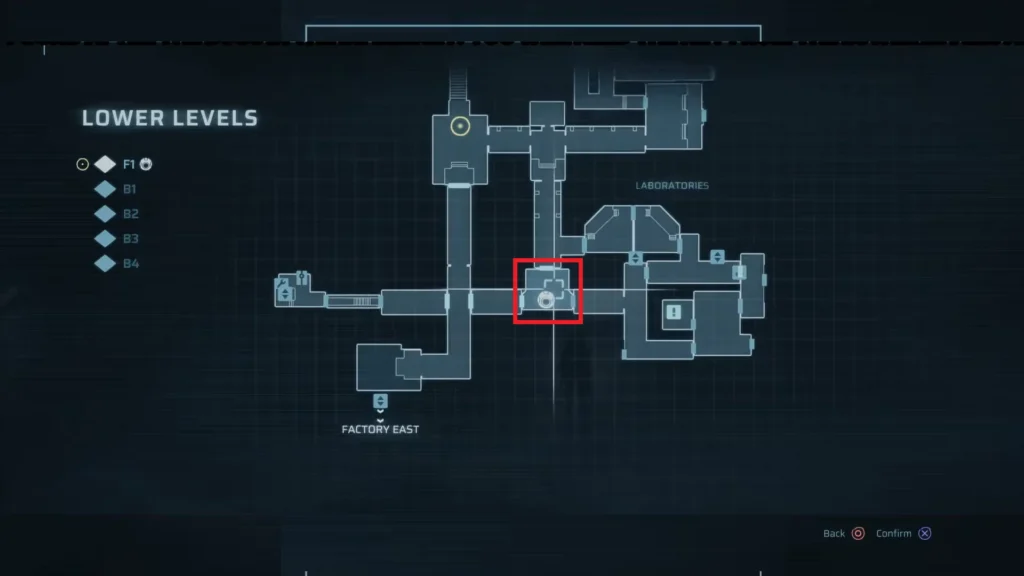
Get to the south section of Floor 1 in Lower Levels, marked on the image above. Here you will come across a pile of corpses and other items. Use the Incinerator to burn all of them to find the Infirmary Access Keycard. This card will now give us access to the Infirmary, where we will find our special final gun.
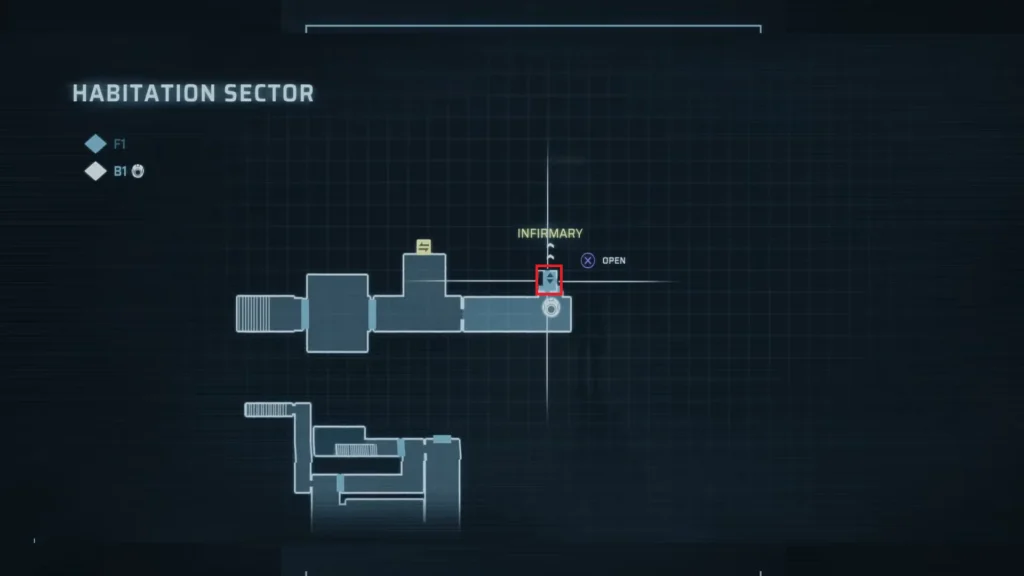
Now we need to make our way to the top-left section of B1 in the Habitation Sector to pick up an elevator ride to the Infirmary.
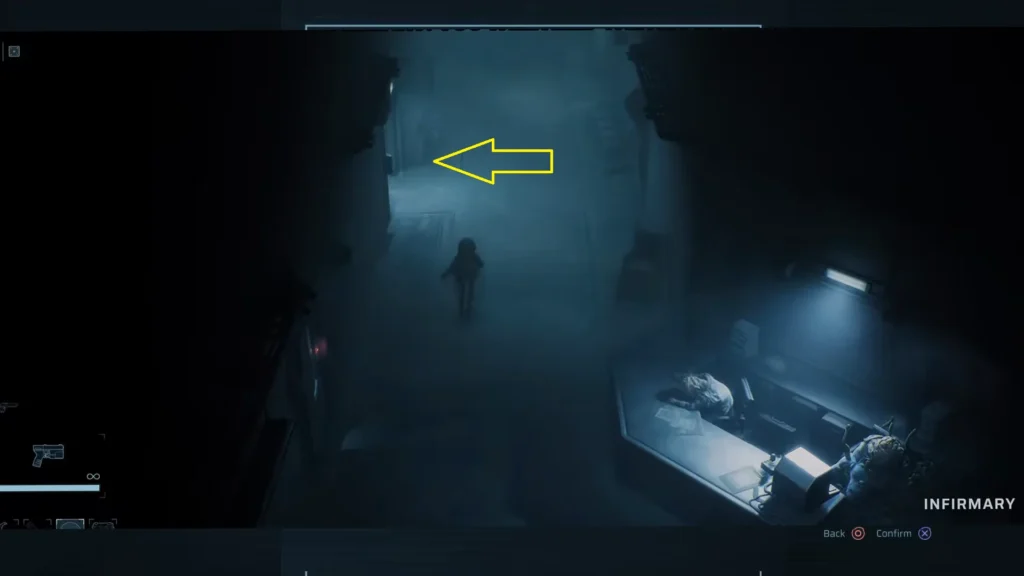
Once the elevator reaches the Infirmary, turn right and head straight. Pass the reception desk on the right, then go through the doorway on the left, as marked in the image above. Once inside, head straight and leave the room by taking the doorway on the right.
Now move down and keep moving towards the right. Here you will see a dead body hanging on the edge of the floor at the top; the door on the left is locked, and it can only be unlocked by using the Restricted Access Keycard.
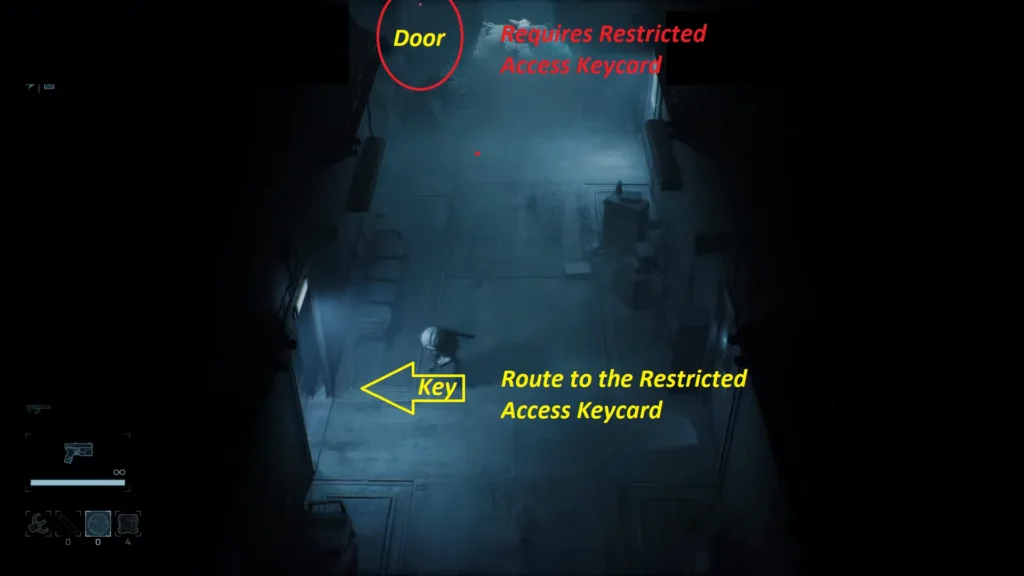
Restricted Room Access Keycard: Move down and head through the room on the left. Inside the room, the goal stays the same, which is to keep moving to the left, once you are out, move into the room across and you will find the Restricted Access Keycard.
Now head back to the room I’ve pointed to before, the one that requires the Restricted Access keycard, marked with a red circle. Get inside the room, take the stairs down to the bottom floor. Do note, it’s going to be a long stairway.
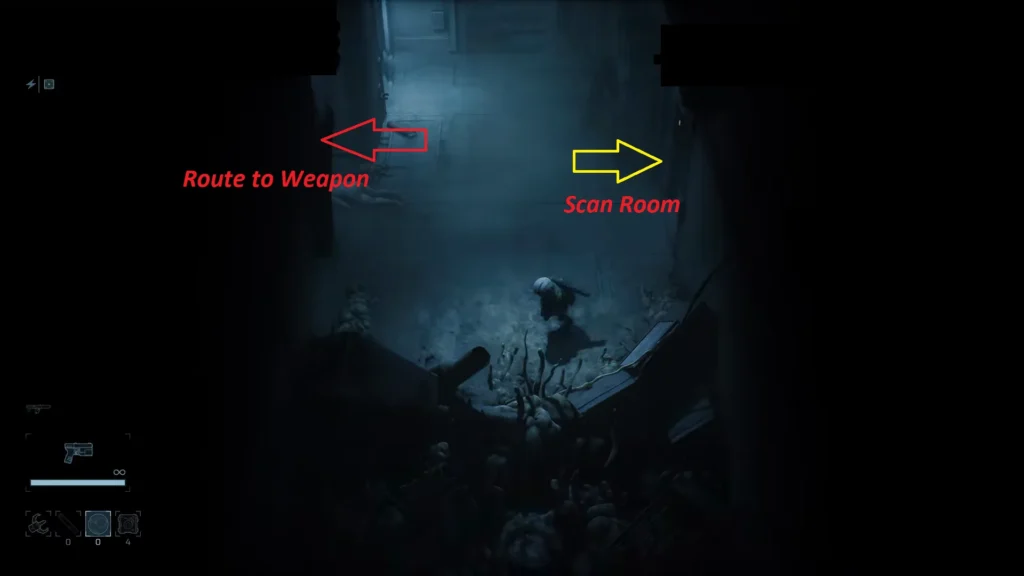
Once you are at the bottom, leave the room and then take the room on the right, as marked on the image above. First, we need to get scanned; then we will go back to the main path, as marked on the image above.
Inside the scan room, interact with a tube-like machine on the left, the one with a red light in the middle. Interact with the machine to head inside, and after a few seconds, you will come out. Now leave the room just the way you came in; now take the way on the left, marked with a red arrow. You will be locked in a combat scenario, so kill all the enemies, then take the route on the left.
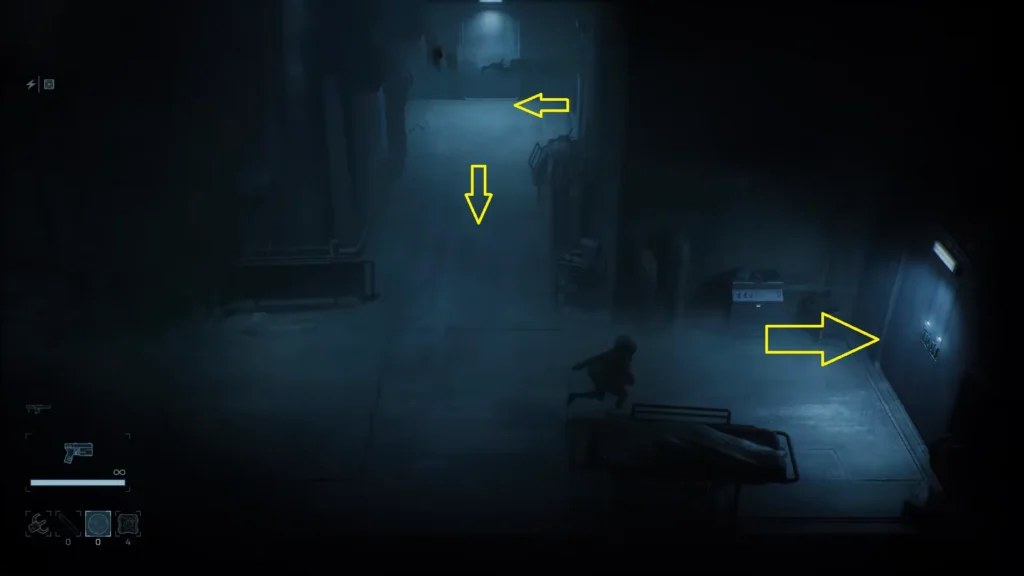
Now move down, then take the route on the right, as marked on the image with the yellow arrow. Keep moving to the right, move down, and then interact with the door on the right.
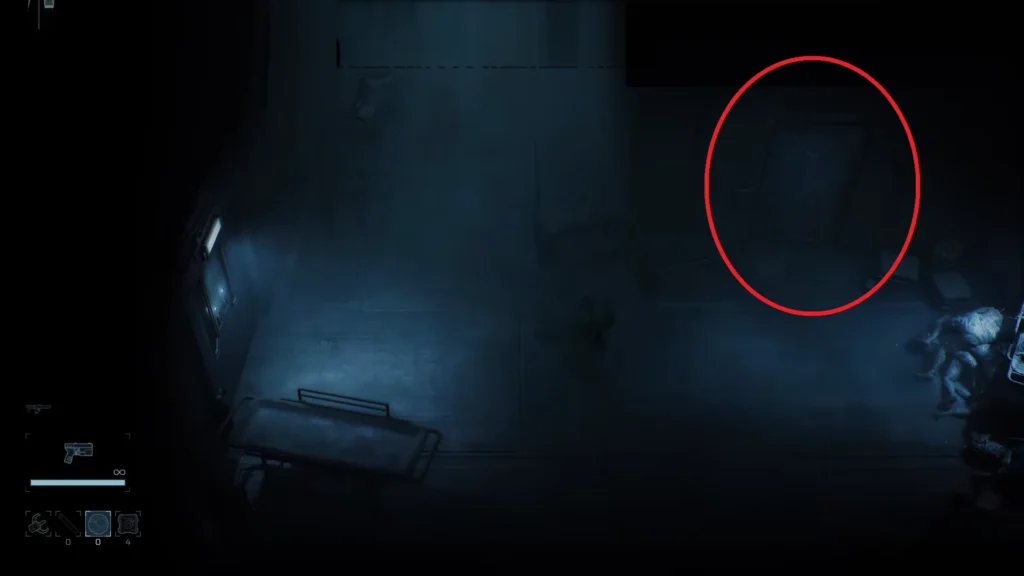
Once inside, keep moving to the right, and you will come face to face with the Morgue Dweller. Defeat the boss. After getting the Vault Key, head a bit north up the boss room. In the corridor section, you will find the Parasitic Growth; equip the Incinerator and set the whole thing on fire to open the secret area. Inside, you will find a box; loot it to get the Particle Disruptor.
The Particle Disruptor weapon is really cool, but the true power of the weapon unlocks later; using it initially might not give you the experience you want from a secretive weapon. It starts off with low damage, but the Particle Disruptor gets extremely powerful once upgraded. The game classifies the gun as very powerful but with a slow fire rate. The gun is shaped like a common pistol, and it also has the power to charge and fire shots at enemies.
