




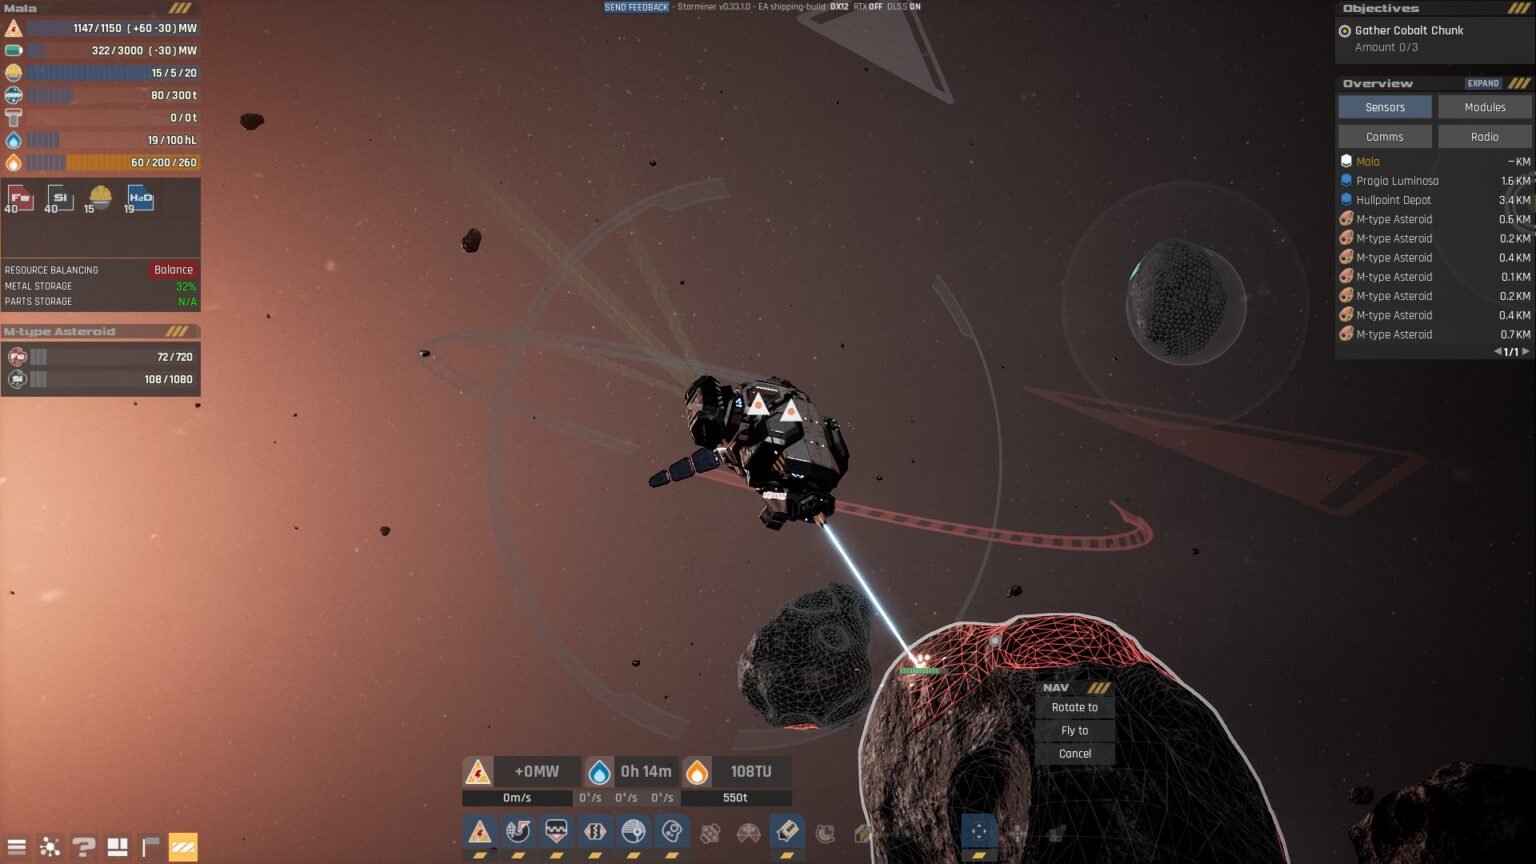

When playing Starminer early on, it can be difficult to understand most of the mechanics related to the mining process (and the camera movement). Mining Laser is a small part; there are other modules that need to be set up properly for effective mining. The mining in Starminer requires precision and good maneuvering of the ship; you need to set up the ship perfectly on the mining object to start the process.
Mining Materials in Starminer
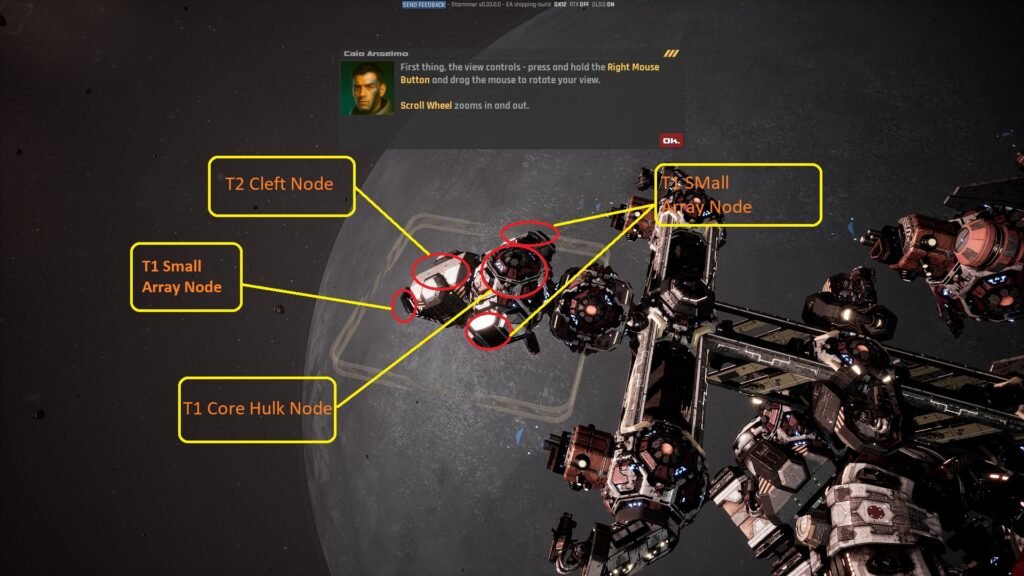
Before we dive right into the mining part of the guide, we need to talk about the installation spot. Part of effective mining is to set up the Mining Laser and Scanner at a perfect spot. The scanner will allow us to detect the materials on the object, and the Mining Laser will carry out the process of mining.
Installing Mining Laser
The ship has three Small Array Nodes, one at the front and two at both sides at the rear, attached to the Core Hulk Node. Ignore the two on the side, focus on the one at the front. This will count as the head of the ship. Make sure to install the Mining Laser on the T1 Small Array Node at the front of the ship.
Installing Scanner
Another thing you will need to install is a scanner. I recommend placing it on the T1 Cleft Node of the ship. So both of your scanning and mining will be carried out by placing the ship on its front instead of turning around for different activities.
I did place the scanner on the back of the ship in the Small Array Node next to the Core Hulk Node without giving a thought. When the scanning began, the movement did get very awkward, as I had to turn the ship to scan the object, and turn it back again to mine it.
Disassemble: If you accidentally build the laser, scanner, or any module at the wrong spot. You don’t have to load the game to rectify the error; press “Ctrl + D” to disassemble it.
Mining Materials
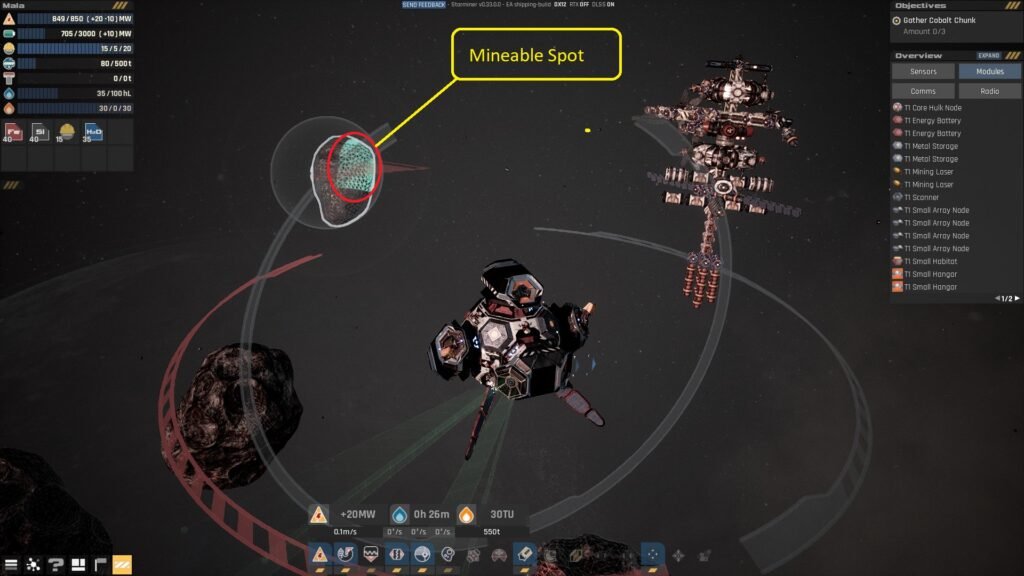
Once everything is installed, head to the nearby asteroid, press V to enter pilot mode, and left-click on the asteroid to choose the “Fly to” option to travel to the location easily. Here, you will also need to activate Linear Dampers and Angular Dampers for steady control of the ship.
Once your ship is near the asteroid, rotate the ship (Shift +W/S/A/D) to angle the Scanner at the asteroid and press ‘C’ to activate the Scanner. A green laser will burst out of the Scanner module, and a progress bar will appear on the asteroid. Once the scanning bar is full, the asteroid will be fully scanned. Now you will see that some surface of the asteroid will have grid-like glowing patterns compared to the rest. The grid-like pattern is the only area on the asteroid that is ready for mining.
Note: you can’t mine the entirety of the asteroid. When you scan an asteroid, only some areas will be worthy of mining; luckily, the game highlights the spot with a glowing grid pattern.
Now rotate the ship to angle the Mining Laser at the grid pattern area on the asteroid, press ‘Y’ to activate the laser to start the mining process. It’s an automatic process; the material will be flying off to the Metal Storage module on the ship.
That’s it, now you will be able to mine materials effectively in Starminer without making unnecessary movements that result in things blowing up.
