





The Blood of Dawnwalker quests cover many secrets, which sometimes lead the player to learn more about the area and face challenging boss encounters, often both in the same questline. Ambrus’s Cellar is one of the best quests in the game, where a simple investigation leads to facing tough bosses and putting an end to a crime syndicate. Just like the rest of the game, you will also run into decisions made almost at the end of every objective to spice up the gameplay.
Besides the story, the quest also has plenty of loot to make up for the time investment. Here is a complete guide to all the objectives found in Ambrus’s Cellar questline in the Blood of Dawnwalker.
Ambrus’s Cellar Quests
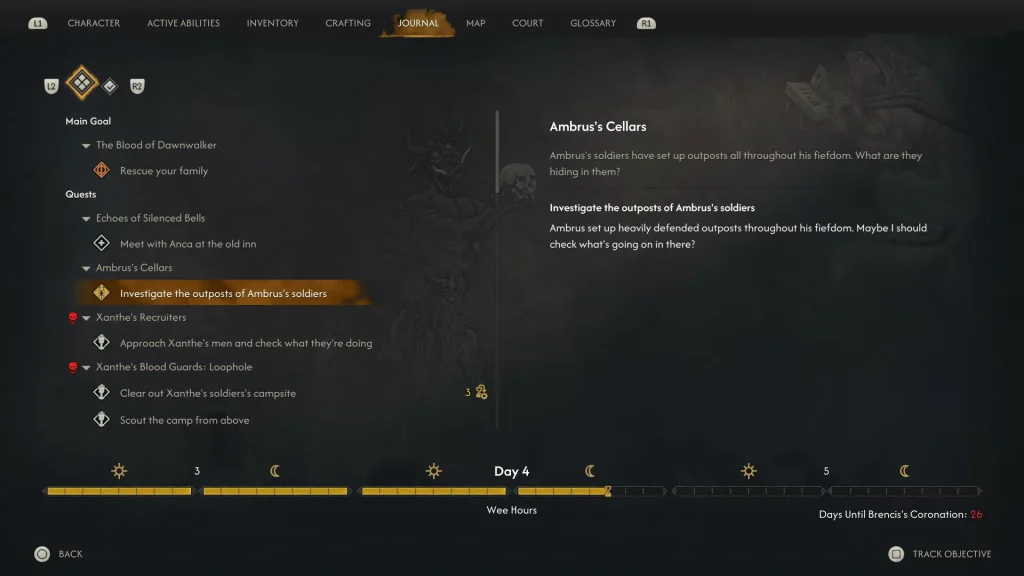
You will find Ambrus’s outposts throughout Ambrus’s Fiefdom in St. Tyna’s Grove. Once you arrive at the first spot, you will get the quest-related items, and then we can begin all three quests down the line. The objectives for each follow up quests stays the same, which is always going to be about destroying Blood Stocks.
- Ambrus’s Cellars Uninvited (Destroy Blood Stocks)
- Ambrus’s Cellars Seeing Red (Destroy Blood Stocks)
- Ambrus’s Cellars Trouble Brewing (Destroy Blood Stocks and Investigate the House)
Ambrus’s Cellars Uninvited
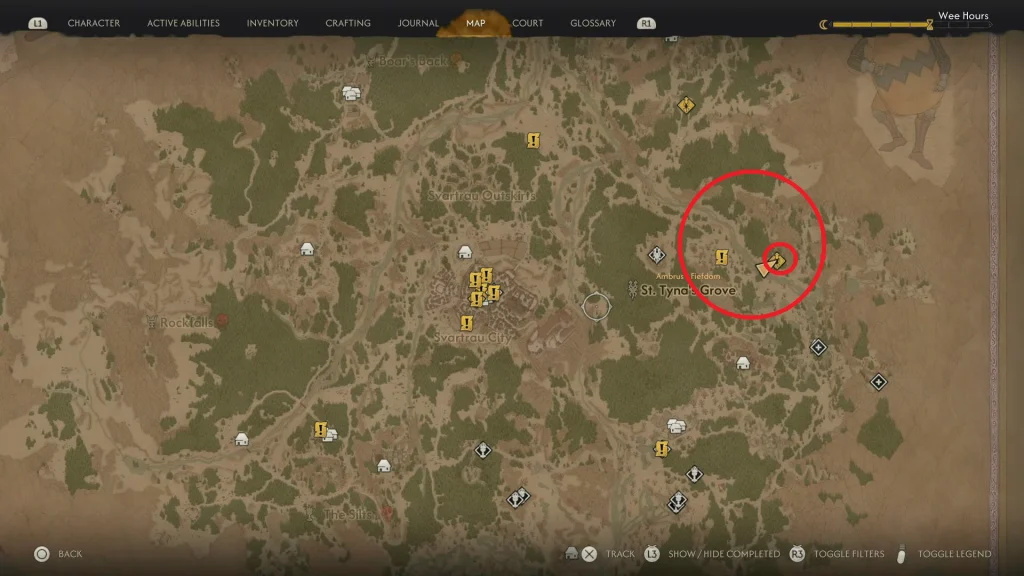
Follow the objective marker and get to the place marked on the map, and you will find a small camp with a couple of dogs roaming inside. The camp entrance will have a yellow banner with a black zigzag pattern on it; this is the symbol to help you identify the places. All the objectives later on the road will have this patterned banner at the entrance, a visual cue that you can use to track down the area easily.
Kill the dogs and then use the Focus Mode to find the body on the ground. It’s in the middle, so you will not miss it. Loot the body to obtain “Orders from Ambrus and Angry Letter From Ambrus“. Do note that these two are the quest items you will need to proceed to the next phase.
Now take the stairs on the right to head deeper into the ruins, and you will get a boss encounter against “Murohn, Malformed Monstrosity“. Defeat the monster, and you will get Murohn Blood, Survivor’s Ring, and Rags off its corpse. Now it’s time to destroy all the barrels or Blood Stocks found in the room; you can collect the blood and then cause the destruction.
Ambrus’s Cellars Seeing Red
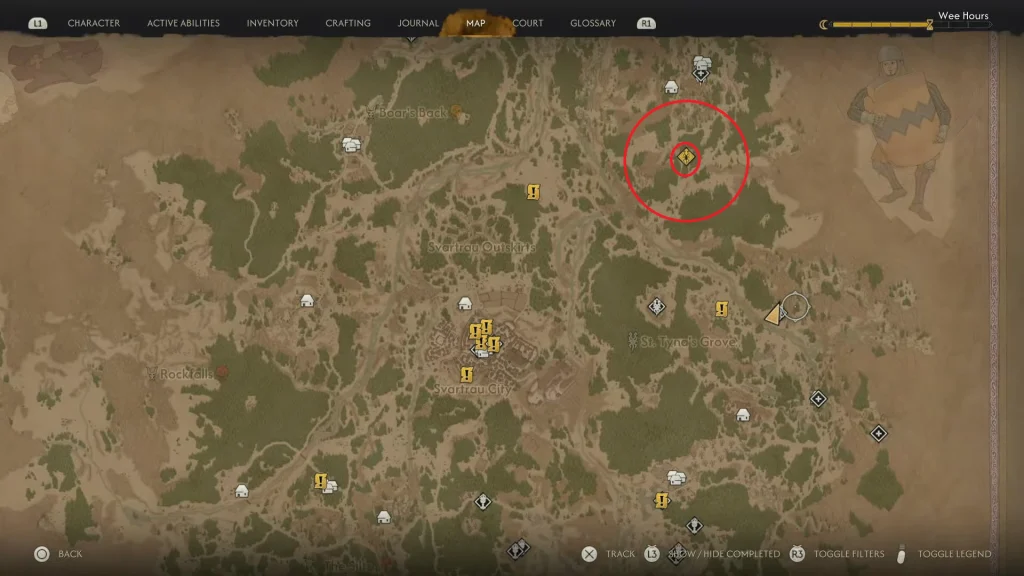
Travel to the spot shown on the map, near the Eerie Knoll. Just like the last one, here you will run into the exact same-looking camp. Instead of facing ruthless dogs, you will deal with armored guards, and there are going to be many of them. Kill all the guards at the entrance, then open the door to go deeper into the area. Right at the end, you will find the area filled with Blood Stocks, but you will not be alone here; you will also deal with another horde of guards. Slay them all, loot their corpses, and then destroy the Blood Stocks.
Note: Do make sure to loot everything; you will find many items, such as Ambrus’s Blood Network map to many files, and don’t forget to loot the corpses to get swords, potions, and junk. I recommend turning on Focus Mode almost all the time while inside the cave, so you won’t miss out on anything important.
Ambrus’s Cellars Trouble Brewing Pt I
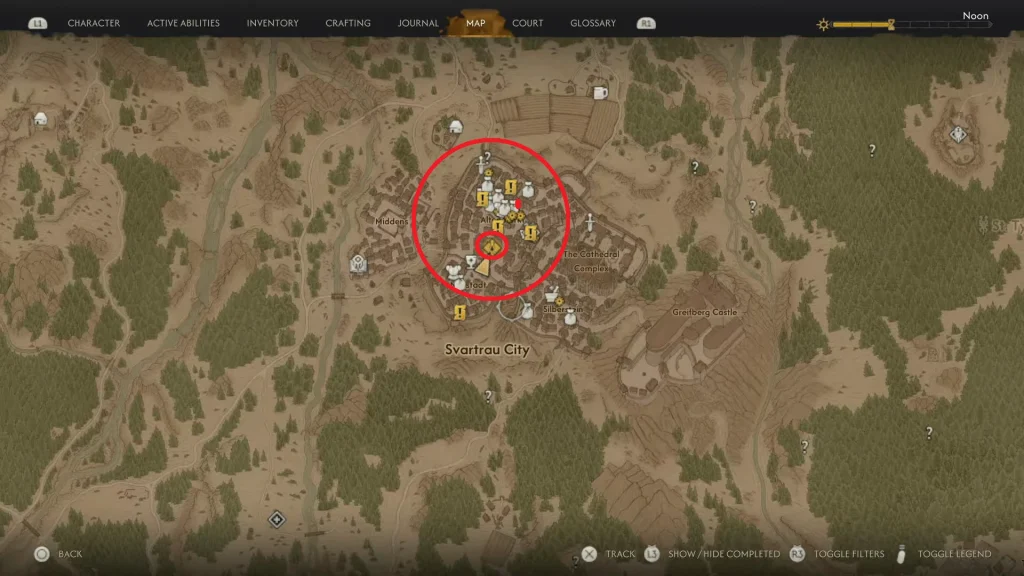
Now get to the middle of Svartrau City, as shown in the image above. Compared to the last two, this one is a bit different, but everything else stays the same. You are not walking to a camp, since this one is in the middle of the city, use the yellow with black zig zag pattern banner to find the location. Get inside; be ready to do the same song and dance: kill all the guards inside the area.
Once the area is clear, use the Focus mode to spot the blood trail leading to a house. You will find the trail of blood on the stairs leading to a closed door. Open the door, head inside, and you will be in the blood stock room with a lone guard in the corner. Defeat the guard and destroy the stocks. Unlike the last two, here we will have a second objective: investigating the place.
Investigate the House
In the same room where we destroyed the Blood Stocks, head to the second floor. You will find all the chemical equipment; interact with all of it. After interacting with all the highlighted areas, go to the door at the corner, next to the pile of bags and boxes. Head inside to find the mastermind behind all the product, an Alchemist, and learn the truth about the whole operation from him to make the final decision.
At the end, you can decide to kill the Alchemist for collaborating with Vrakhiri or let him go. Freeing him rewards you with the Lasting Malediction Manual and the Potent Razor Claw Vial. I recommend freeing him, as he was rather coerced into taking part in this shady operation, and the rewards are also good.
